How to automate i-SIP payment with SBI internet-banking?
SIP or Systematic Investment Plan is a method of payment into mutual funds. With the help of SIP, you can invest a predefined amount into a mutual fund on an interval like monthly, quarterly, etc.
The main benefit of SIP is, it allows automatic payments. That means you need not pay by yourself. On a particular date of a month, the amount automatically gets debited from your savings account. SIP can be created both in online and offline mode. The online-mode of SIP is called i-SIP.
i-SIP is a paperless SIP registration process with the help of internet banking services. Most of the authorized banks offer this service. Automating I-SIP using internet banking requires a biller to be linked with a URN (Unique Registration Number).
In this article, I’m going to share with you the i-SIP registration process using SBI net-banking or onlinesbi.com.
How to register an i-SIP URN number in SBI Internet Banking?
If you have an SBI internet banking service, you can easily enroll for i-SIP. On completion of SIP registration on the mutual fund platform, you will receive a URN (Unique Registration Number). The URN is essential in order to activate SIP with Internet Banking. Here are the steps of activating SIP through SBI Internet Banking:
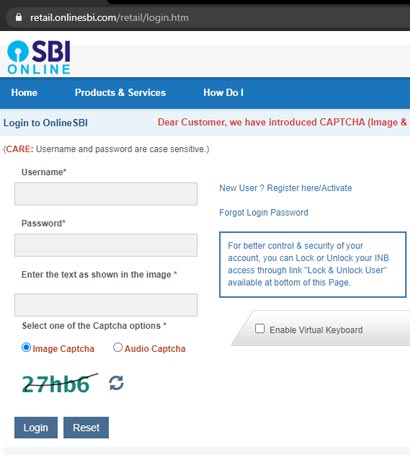
- Visit the SBI internet banking portal
- Log in with your internet banking credentials
- Click on ‘Bill Payments’ from the main menu options
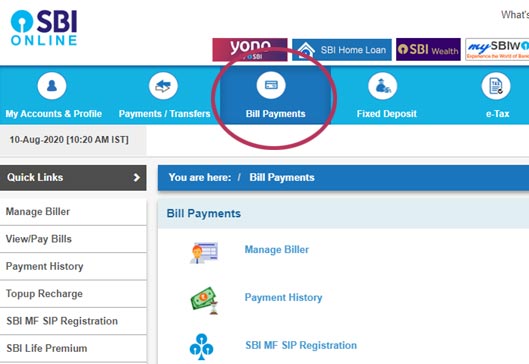
- In the ‘Bill Payments’ section, you have to click on the ‘Manage Biller’ option
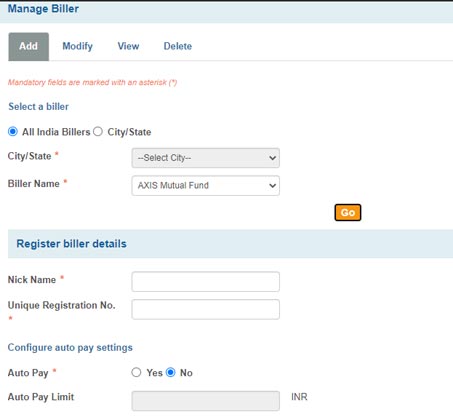
- Now click on the ‘Add’ Tab
- Then, choose the Biller from the ‘Biller Name’ dropdown. Eg. Kotak Mutual Fund Isip
- Click on the ‘Go’ button to proceed further
- ‘Register Biller Details’ prompt will arrive and you need to provide the following details:
- Nick Name: Any name up to SIX characters. Eg. KOTMF
- Unique Registration Number: The URN provided by your mutual fund house.
- AutoPay: Choose ‘Yes’ or ‘No’. If you choose ‘Yes’ your SIP payments will be done automatically. And for ‘No’ you have to pay the amount manually or by yourself. In this article, we are discussing the auto payment mode. So, we are moving further with the ‘Yes’ option.
- AutoPay Limit: Enter the exact SIP amount you mentioned while SIP creation.
- Now, choose the debit account (Your Savings Account) from the Accounts list.
- Click on the ‘Submit’ button.
- You will receive a High-Security Password or like OTP on your internet banking registered mobile.
- Input the password and click on the ‘Confirm’ button.
- On successful i-SIP registration, an acknowledge number will be provided by the internet banking portal.
How to modify or delete i-SIP with SBI Internet Banking?
The main advantage of i-SIP is, you can modify or delete it whenever you want. This is very simple to do. All you need to go ‘Biller Section’ and choose for ‘Modify’ or ‘Delete’ option.
That’s all, now you are done. If you have any queries regarding this, post in the comments section below.