How to set up SIP for NPS using D-Remit service
If you wish to automate your NPS contributions like SIP, here is good news for you. Investments under the National Pension System (NPS) with the new D-Remit facility are now even easier and convenient. PFRDA, the Pension Regulator, recently launched the D-Remit or Direct Remittance facility that lets NPS subscribers contribute under NPS using internet banking services. Investments using the D-Remit facility, investors can get the same-day NAV update. Earlier contributions through NPS mobile application or eNPS portal take T+2 working days to reflect the NAV on the account. However, the old contribution methods are still available.
Benefits of D-Remit in NPS
Same-Day NAV
The main advantage of D-Remit is the same-day NAV reflection. Transferring funds using D-Remit at 8.30 am or earlier will reflect the equivalent NAV in the NPS account on the same day.
The window for Systematic Investment Plan (SIP)
With the Direct-Remittance service, a subscriber can set up automatic contributions. If the subscriber has an internet banking facility, he/ she can place periodical auto-debit instructions through the net banking portal.
Quick Transfer
The new upgrade allows subscribers to transfer funds using the NEFT/ RTGS system. Just like transferring funds between regular bank accounts. This option will let subscribers pay quickly without visiting the NPS portal or application.
How to set up the D-Remit facility for NPS
Using the D-Remit facility is not a hard thing. All you need to have an internet banking service and an NPS Tier-1 account. However, you can transfer funds in both Tier-1 and Tier-2 accounts using the D-Remit service. Here are the steps:
- To opt for the D-Remit service, an NPS subscriber must create a Virtual ID for his/ her NPS account. The Virtual ID will be different in case subscribers has Tier-1 and Tier-2 both accounts. Existing NPS subscribers can create Virtual IDs from the CRA-NSDL portal or kfintech portal. On approval, the subscriber will receive the virtual ids by SMS and email.
- After getting the Virtual ID, you need to log in to your internet banking portal to add a new payee. Now, add a new payee with the following details:
Bank: Axis Bank Ltd.
Account Number: Your NPS Virtual Account Number
Account Type: Current
IFSC Code: UTIB0CCH274 (The fifth character is Zero) -
Once you have finished adding the payee, you can transfer funds using NEFT/ RTGS to your NPS account anytime during banking hours. The minimum contribution value using D-Remit is Rs. 500. As per the PFRDA guidelines, you should enter 'NPS Contribution for D-Remit' as a transaction remark or narration during fund transfer.
For recurring payments like SIP, you can create a standing instruction from the internet banking portal. With the standing instruction, you are authorizing your bank to transfer a certain amount of funds to another account for a period.
How to create NPS Virtual ID or account?
In order to transfer funds using the D-Remit facility, you must have to create a Virtual ID linked with your PRAN. Here the steps to create a Virtual ID from CRA:
- Visit the virtual account registration page of the CRA-NSDL portal.
- Verify your PRAN by providing such inputs as PRAN and Date of Birth.
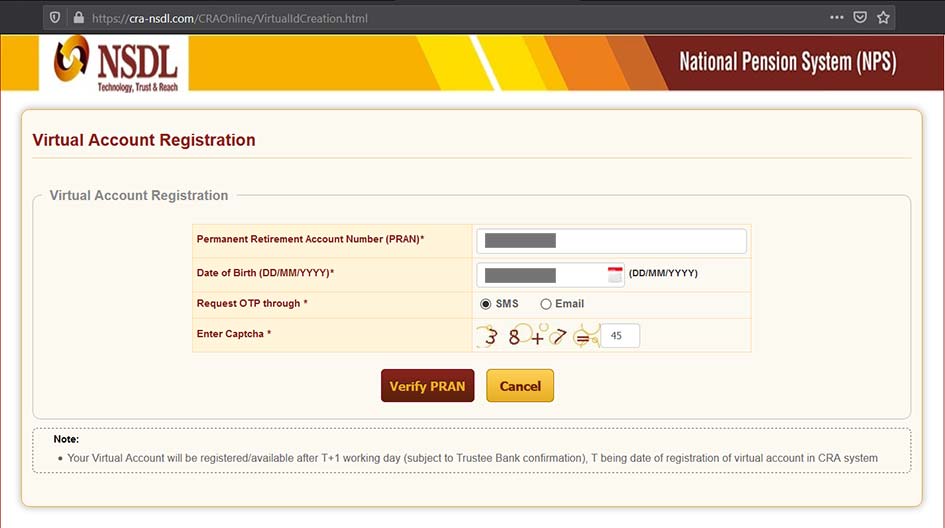
- While PRAN verification you need to input an OTP that you will receive in your mobile or email.
- Next in the consent form, you have to choose ‘Virtual Account Registration Type’ from among three choices, those are Tier-1, Tier-2, and Both. If you wish to create a virtual ID for your NPS Tier-1 account, choose the Tier-1 type option. If you choose the ‘Both’ option, you will receive two separate virtual IDs for Tier-1 or Tier-2 accounts respectively.
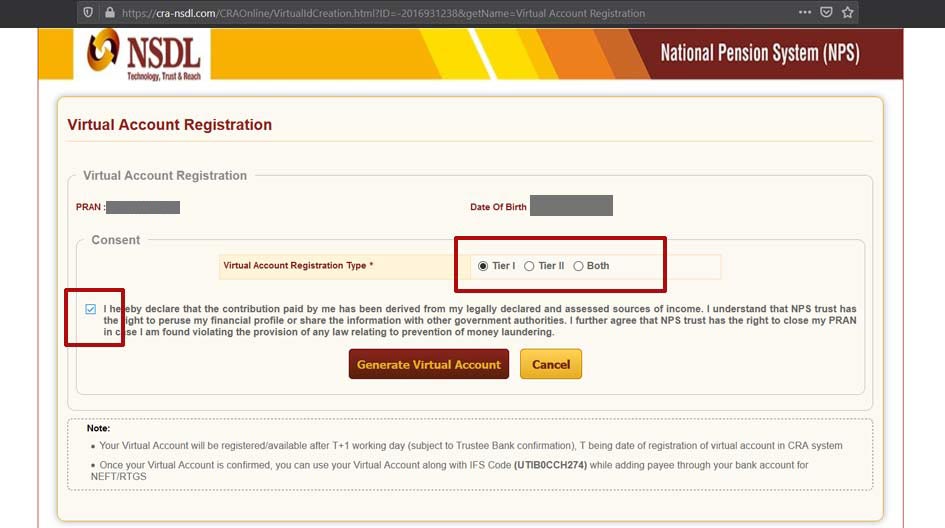
- After choosing the ‘Virtual Account Registration Type’, check-mark on the consent agreement checkbox. Then click on the ‘Generate Virtual Account’ button.
- Once you submit your request, you will receive an acknowledgment number for your request.

- After a while, if your request gets approved by CRA, you will receive your virtual account ids in your mail or SMS.
How to set up SIP for NPS with SBI NetBanking
You can set up automatic contributions to your NPS account using SBI internet banking. All you need to have your Virtual Account Number provided by NSDL-CRA for your NPS account and a Net-Banking enabled SBI account. With the help of Standing Instruction, you can start automating payments to your NPS Tier-1 or Tier-2 account for a period. Here are the steps:
Phase 1: Add New Beneficiary
- Open SBI Net-Banking portal
- Login using your credentials
- Click on 'Add & Manage Beneficiary' from 'Payments & Transfer' tab.
- Provide your profile password and click on the 'Submit' button.
- Click on the 'Other Bank Beneficiary' option
- Fill in the following beneficiary account details:
- Name: Your Full Name as NPS Account
- Account Number: Your Virtual Account Number
- Confirm Account Number: Your Virtual Account Number
- Choose the 'IFSC Code' radio button and enter UTIB0CCH274.
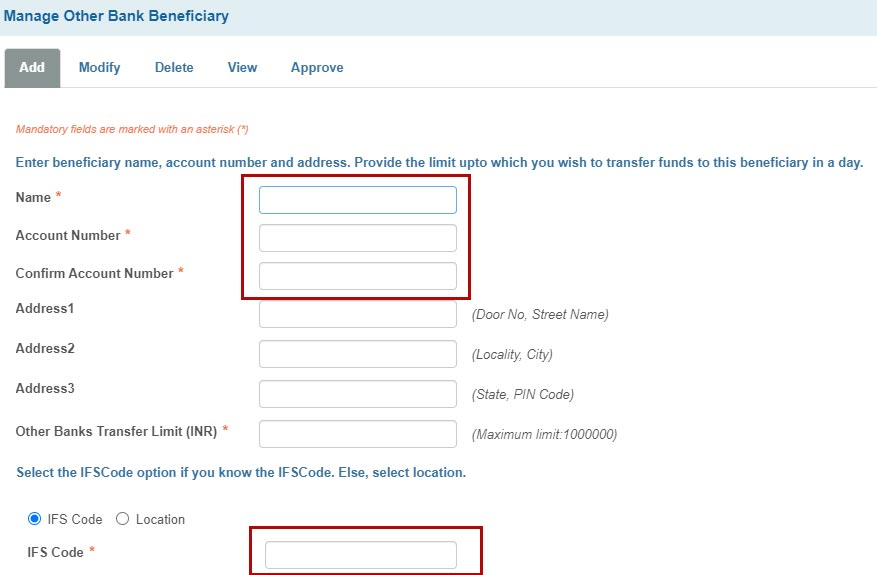
- Click on the 'Submit' button.
Phase 2: Setting new Standing Instruction
Once you added the payee information, you are ready to create a standing instruction that will enable automatic payments in the future. Here are the steps:
- Visit SBI Net-Banking portal
- Login using your credentials
- Click on 'Other Bank Transfer' from the 'Payments & Transfer' tab.
- Choose NEFT/ RTGS from 'Transaction Type' and click on the 'Proceed' button.
- Choose debit account
- Enter the amount you want to make your SIP (Minimum 500)
- Now, select your recently added NPS virtual account as the Beneficiary account.
- Choose the 'Standing Instruction' option and fill in the following details:
- Frequency: Days/ Month
- Schedule payment every: The the payment day (Eg. 5 or 5th of a month)
- Enter the no of payments: Number of automatic payments you want to make.
- Select the start date: The first date of the payment
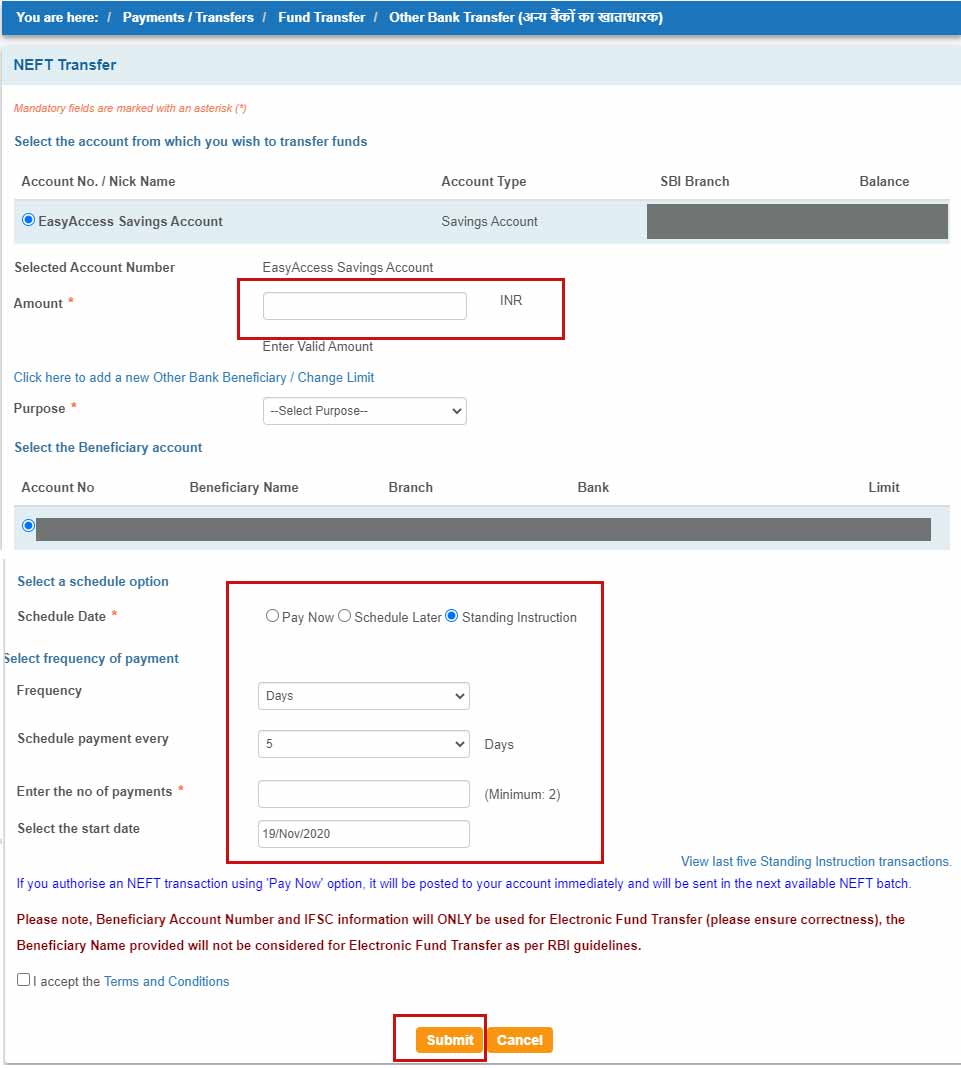
- Now click on the 'Submit' button to finish.
Once you have completed these steps, your SIP registration setup is complete. Now you no need to contribute to your NPS account manually. As per your debit instruction, the future contributions will be done automatically and the equivalent NAV will be reflected on the same day.
Read: NPS Withdrawal Rules - Premature Exit Rules
NPS Contributions under D-Remit using IMPS
Subscribers under National Pension System (NPS) can now make their contributions using the IMPS (Immediate Payment Service) service. Earlier, the facility was limited to NEFT and RTGS. According to PFRDA (The Pension Fund Regulatory and Development Authority), the new service started on March 1, 2021. The new facility will take one extra day (T+1) for the 'credit adjustment process' as per the guidelines of NPCI to reflect the fund on your NPS account. However, funds transferred using D-Remit using NEFT/ RTGS on or before 8.30 am reflect the equivalent NAV in the NPS account on the same day.
Recommended Article: NPS (National Pension System) - Features, Tax Benefits, and Drawbacks